Showing posts with label baking. Show all posts

Monday, March 2, 2015

Diane's Blondies


I first had these blondies around the holidays at the Hodges'.  Their family friend, Diane, made them for the family.  They are one of our favorite treats.  AND, most the time when I make them I don't even pull out the mixer! 

INGREDIENTS:

2 sticks melted butter
1 lb (box) light brown sugar or 2 cups firmly packed
1 tsp vanilla
2 tsp baking powder
1/4 tsp salt
2 c. all purpose flour
2 large eggs, beaten
1 c. pecans (even for Hunter who doesn't like nuts)
1 c. semi-sweet chocolate chips (I throw in what I have - sometimes add butterscotch for fun.  The TJ baking chips work well in this recipe, too!)


DIRECTIONS:


-Preheat oven to 350 degrees.

-Grease 9x13 glass baking dish.  

-Note: I mix the entire list of ingredients in an 8 cup pyrex.

-Melt butter in pyrex; add brown sugar, and vanilla.  Mix well with a whisk.

-Add baking powder and salt; mix again.

-Stir in flour with a spatula; batter will be stiff. 

-Crack eggs in small bowl; beat well; add to batter; stir. 

-Add nuts and chips.  (Even Hunter will eat nuts in this recipe!)

Note: I tend to put aside some of my chips and poke them in the top of the dough before I bake.  It helps with presentation but is totally unnecessary!

-Bake @350 in greased 9x13 dish until top becomes golden brown (35 minutes for my gas oven).  I don't spend a lot of time spreading the batter to the outer edges since it will spread during baking. 

-Makes about 2 dozen.

______

I had to include this picture from when Hunter made these before we were married.  His old dishes! AND his clever make-shift cooling rack (engineer ingenuity).


Monday, May 20, 2013

Maw's Banana Bread


Maw's Banana Bread

I had to triple check to be sure I had not posted this recipe before.  This was THE first recipe I knew by heart and I remember making it long before college.  I still have not found a better banana bread.  According to the rate it disappeared this morning at work, I am not the only fan!

I've decided for many of these recipes I am going to skip boring pictures.  I can only take shots of the mixer and batter so many times before they all start looking the same, even for me!


I love this recipe card.  Mom must have covered it in contact paper to preserve it.  It's had a lot of use!


This is my secret.  I now only use frozen bananas.  The thought used to give me the heebie jeebies.  But after I tried it a couple years ago, it works out well.  They mash so much easier, provide more liquid, and are so very convenient!  (On a side note, I freeze the bread often once its baked and it is also wonderful.  I have 3 small baking pans that I used last time to try to limit myself!)


It took me 2 years to go through the huge tub of crisco you see in this picture.  It was embarrassingly large.  I ran into this the other day and figured it is worth a try.  So far, it is a wonderful substitute.  If anything, it makes me feel better!


The batter still ranks in my top 5 batters of all-time.  Nuts are optional but with Hunter gone, they are a necessity in my book. I love them.


I used bread flour this time and it never seems to rise enough but I wanted to finish the bag.  Basic all-purpose is my first choice!


And here we have a photo of my favorite way to enjoy the bread.  Ok, second favorite way.  My favorite is the toaster!

Wednesday, May 15, 2013

Maw's Ham-Cheese Quiche


Maw's Ham-Cheese Quiche

Last night I returned to cooking for my family recipe book.  Hunter was in town for the weekend and I gained a few pounds (at least) from all we ate.  Friday night we even had dinner at Hot and Hot Fish Club.  We've now been to Highlands and Hot and Hot...two on my list thanks to White Plume (who has given me the thank-you dinners).  It is now official.  After 8.5 years I will be leaving my work family to start a new adventure.  It is a wonderful opportunity to put my MBA to use. I hope my new office likes to eat.  Or I will still be delivering goodies to White Plume on a regular basis!
Back to the quiche.  I had some for lunch today and took pictures. I will certainly be making this again! 
Maw's Ham and Cheese Quiche

Serves 6

Ingredients: 

9" pie crust (I cheated and used the frozen ones...thawed it before using.)
1 1/2 c. grated Swiss Cheese
4 tsp flour
1/2 c. diced ham
3 eggs
1 c. milk
1/4 tsp dry mustard
1/4 tsp salt

I love Maw's recipe cards. What she lacked in handwriting she made up with her script typewriter.
I cheated and used a pie crust. Next time I will use Maw's pie crust recipe!
I honestly left the foil on the entire time. Next time I will not put it on the top rack. Instead, I will be sure it is in the center of the oven.


I was walking the dog when I should have kept it from browning.  Again, I won't put it on the top burner next time.  It still tastes delicious. You can certainly add more ham than 1/2 cup if you choose!

I felt like it was time to sneak in a Brody picture. We ate on the patio. Here he is doing his version of downward dog...he sticks out his tongue. It is my favorite!

Saturday, March 2, 2013

Apple Brie Wraps

It's snowing outside and I could argue it's colder than Idaho.  Honestly.  So today I stayed inside (even though I have a case of spring fever). 


I will keep this recipe and use it often. (Thank you, Pinterest.) Everyone agreed it was a great find.  It will take you no time. Plus, it is only 5 ingredients!


Honey
Brie
Crescent Rolls
Apple
Pecans

I don't have exact measurements but you can take liberty as you see fit.  I also saw mentions of cheese substitutions and one person used pears in the place of apples.  The original recipe called for tart apples. I am not a fan of tart apples so I found Jazz apples.  I thought the red would be pretty but this time, I couldn't even see them.  I would purchase 2 packages of crescent rolls for sure.

This is how I sliced the cheese.  I've heard of brie logs but this worked just fine.  I sliced the block lengthwise and the slices into 3 pieces.

And now we have a picture of the assembly.  When I made the appetizers earlier this week, I laid everything out on a cookie sheet but the apples and put it in the frig. The crescent rolls dried out a bit but, after baking, there was no difference.  When it was time to bake, I cut the apples.  This time I tried slicing the apple lengthwise so the pieces were flat for stacking.  Last time I did make slices and evened the top so the toppings laid flat.   

Place the ingredients in the middle of the dough.  I first folded over the big flap and then secured it with the pointed part of the crescent roll.

Bake @ 375 degrees for approximately 12 minutes.

The house will smell FABULOUS.

I couldn't resist.  I sampled.  To show you, of course. 

Sunday, February 10, 2013

Mom's Cheese Straws


Mom has been making cheese straws frequently (that is an understatement) for the past few years.  Last year she got all 3 daughters our own cookie press.  She searched high and low for the best one and landed on Mercato press below.  I am embarrassed to say I have only used mine twice (on my own).  People are fascinated with cheese straws.  The ingredients are simple but parts are labor intensive.  The best part...they are WONDERFUL to freeze and frozen.  In fact, I love them right out of the freezer.  That is not necessarily a good thing and is why I had to make another batch for a party in a few weeks.

RECIPE:


*Mom said she bakes hers for 15 minutes.  No wonder mine were burned!*

INGREDIENTS:


This is the first labor intensive part.  You do NOT want to purchase pre-shredded cheese.  It is too dry and will not hold the ingredients together.  In fact,  I had a block of both Publix and Kraft sharp cheddar.  The Publix brand worked much better.  The Kraft would fall apart in chunks while grating.  I look for the cheese when it is on special.   You can see the recipe card reads you can substitute other cheese for cheddar.  I haven't tried it but if I do, I will let you know. 

Note: Often extra sharp cheddar is drier than what is needed.  I always use sharp cheddar.  (Since this original post I got married and was gifted the most amazing food processor that does this grating for me in a matter of seconds...not as much of an arm workout!)


Measure the dry ingredients and place it in a gallon zip-lock bag below (flour, salt, baking powder, pepper).  Give it a good shake.  Add the shredded cheese and shake again.


Melt your 2 sticks of unsalted butter in a large mixing bowl that will hold all ingredients.


Now comes labor intensive part #2.  Wash your hands well (please), pour dry ingredients into bowl with butter and mix with your hands.  You will want to knead until it becomes play-dough.  You want to get rid of all crumbles.  It takes awhile but be patient.  It will eventually look like my picture below.


Now time for the cookie press.  This is the kind we use.  


This cookie tip is what creates the "straws."


Roll the dough in logs for the cookie press.


 I will admit this part KILLS my hands.  Cue labor intensive part #3.  The dough is hard to push through the press.  Today I learned my oven mitt provides some protection!


I have two large INSULATED cookie sheets I use for my oven that are perfect for the top and bottom shelves.  Don't worry if they break and are not perfectly straight.  The below cookie sheet is a fluke and the best I've ever done.  You will cut them after they cook anyway!


Cook at 325 for about 15 minutes.  Your oven can vary so keep an eye on them.  They are not tasty brown so do not overcook.  Once they come out of the oven, split the straws in desired lengths with a plastic spatula (don't want to scratch your cookie sheet). 


The recipe is easily doubled if you would like (and have the self control) to keep some in the freezer.  To give you an idea, the recipe above made enough to fill these three containers.  Mom found these containers at WalMart and are the perfect size once sliced.


Now,  I will have to send this link to my coworkers.  There were many conversations around the baby shower table on how you make cheese straws!

Thursday, July 19, 2012

THE best Red Velvet Cake

THE BEST Red Velvet Cake

I tried another banner for the cake and found flowers to match!
This week was Shannon's work wedding shower...and I baked a cake (no surprise there). Luckily the groom loves red velvet and it just so happens to be MY favorite kind of cake.  Not to mention a red velvet is also a great excuse to make cream cheese icing! Since work tends to be the best place to try out new recipes, I went for a new one. 

How does one decide which recipe to try?  I start by reading MANY reviews.  One particular recipe stood out to me because it was very similar to the Beatty recipe.  It also has coffee.  This recipe has half the coffee but is even MORE moist.   I am keeping this recipe in a safe place!  Let me know if you enjoy it as much as I do.  Mom was making it for a church event so I will let you know how that turns out!

Ingredients
  • 2 cups all purpose flour
  • 1 teaspoon of baking soda
  • 1 teaspoon of baking powder
  • 1 teaspoon of salt
  • 2 Tablespoon of unsweetened, cocoa powder
  • 2 cups sugar
  • 1 cup vegetable oil
  • 2 eggs
  • 1 cup buttermilk
  • 2 teaspoon of vanilla extract
  • 1-2 oz. red food coloring (I used Wilton Burgandy - 1/3 the pot)
  • 1 teaspoon of white distilled vinegar
  • 1/2 cup of prepared plain hot coffee (don’t skip this ingredient)
Instructions
  1. Preheat oven to 325.
  2. In a medium bowl, whisk together flour, baking soda, baking powder, cocoa powder and salt. Set aside.
  3. In a large bowl, combine the sugar and vegetable oil.
  4. Mix in the eggs, buttermilk, vanilla and red food coloring until combined.
  5. Stir in the coffee and white vinegar.
  6. Combine the wet ingredients with the dry ingredients a little at time, mixing after each addition, just until combined.
  7. Generously grease and flour two round cake pans (I used 2 8-inch and it worked wonderfully) with butter and flour.  I used parchment paper to line it again.  With a cake this moist it will certainly help it from sticking!
  8. Pour the batter evenly into each pan.
  9. Bake in the middle rack for 30-40 minutes, or until a toothpick comes out clean. Do not over bake as cake will continue to cook as it cools. (I baked mine for 34 minutes and was scared it was not done but it was perfect.)
  10. Let cool on a cooling rack until the pan are warm to the touch.
  11. Slide a knife or offset spatula around the inside of the pans to loosen the cake from the pan.
  12. Remove the cakes from the pan and let them cool.
  13. Frost the cake with cream cheese frosting when the cakes have cooled completely.

Wednesday, July 18, 2012

Beatty's Chocolate Cake

Cute party theme (including cake banner) all done by Kat!
It is true.  I have officially gone into school recovery mode - doing the things I have missed.  I baked cakes for two events this past week.  When I am baking for events I am extra careful.  I sift the flour a little more....I watch the oven a little more....it is probably good for me!  Brody has learned the phrase "get out of the kitchen" (as I point to his spot on the rug).  He was a good sport.  I spent too much time at first tripping over him and making sure I didn't drop cocoa (aka doggie poison) on the floor. 

I mentioned this cake in earlier post about Katharyn's baby shower.  That was the first time I made this cake.  It was such a hit it returned for Louis' first bday.  It is now my go-to chocolate cake recipe.  It is a moist chocolate cake.  I am not super crazy about buttercream icings (such as this one....in fact...i wont even list the one I did on this blog).  Next time I plan on trying it with cream cheese icing. 
I hate to even let the cat out of the bag but it has ONE CUP of coffee in the recipe.  It wigs people out if they don't like coffee but I PROMISE it is the secret ingredent (to my red velvet recipe too, actually).  It makes the cakes SUPER MOIST.   Credit does to Ina Garten and with about 1500 reviews and 5 stars on the Food Network website, you can't go wrong! 

Beatty's Chocolate Cake
Ingredients
  • Butter, for greasing the pans
  • 1 3/4 cups all-purpose flour, plus more for pans
  • 2 cups sugar
  • 3/4 cups good cocoa powder (honestly, i used Hershey)
  • 2 teaspoons baking soda
  • 1 teaspoon baking powder
  • 1 teaspoon kosher salt
  • 1 cup buttermilk, shaken (the smallest of containers I found was 2 cups worth)
  • 1/2 cup vegetable oil
  • 2 extra-large eggs, at room temperature
  • 1 teaspoon pure vanilla extract
  • 1 cup freshly brewed hot coffee (Keurig makes the perfect one cup amount)
Directions
  • Preheat the oven to 350 degrees F. Butter two 8-inch x 2-inch round cake pans. Line with parchment paper, then butter and flour the pans. (I read of people using 9 inch pans with no problem. In fact, it may help the sinking that happens easily when overbeating?)
  • Sift the flour, sugar, cocoa, baking soda, baking powder, and salt into the bowl of an electric mixer fitted with a paddle attachment and mix on low speed until combined.  (My kitchenaid made a MESS doing this...the bowl was not large enough so beware!)
  • In another bowl, combine the buttermilk, oil, eggs, and vanilla. With the mixer on low speed, slowly add the wet ingredients to the dry. With mixer still on low, add the coffee and stir just to combine, scraping the bottom of the bowl with a rubber spatula.
  • Pour the batter into the prepared pans and bake for 35 to 40 minutes, until a cake tester comes out clean. (I literally did mine for 36 minutes...note to self....my oven is cooking MUCH faster on the right side).
  • Cool in the pans for 30 minutes, then turn out onto a cooling rack and cool completely.

Monday, July 4, 2011

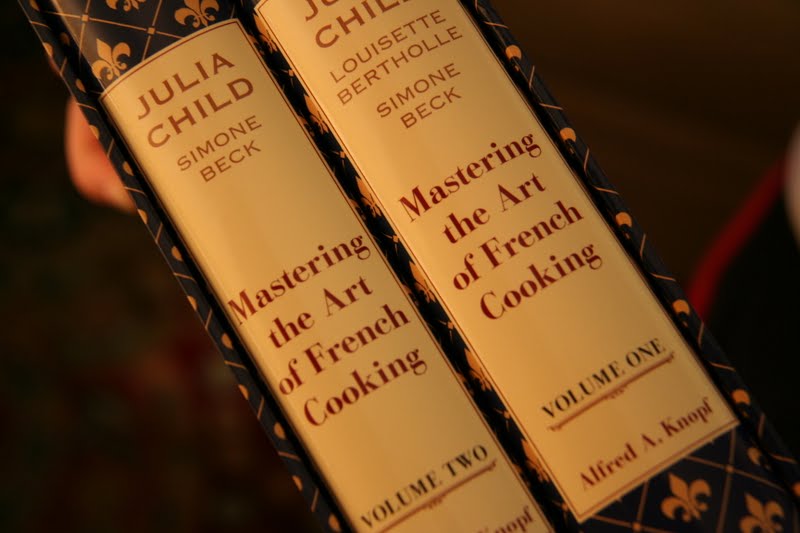
Julia Child's Spinach Souffle

Julia - I do not think your books are suited for me.  This is why I waited until I was with Catherine to attempt a recipe. 

I think we succeeded!  Evidence...

I think I will stick to the basics for now, though.  Below are our steps along the way:

Spinach and scallions...

Making the sauce...


Separating the eggs...


Swiss cheese...the more the merrier...

Adding yolks to the sauce...

Egg whites...the main ingredient....

Mixing it all before we...

Slowly folded in egg whites...

More egg whites...

Lining the pan with cheese and butter...Catherine noted to butter in the upwards direction to encourage it to rise...

Catherine also showed me another trick.  By scraping the edge of the pan with your finger, it will rise upward more than outward.

Impatiently waiting...30 minutes FINALLY.  Yes, we got to eat at 10.  It was a long day and a late start!
Example of patiently waiting...

And the result!


Catherine just came back from France a couple weeks ago so this was perfect.  We thought about macaroons but for some reason they scare me.  I think I will eventually get over it...