Monday, November 21, 2011

Crockpot Pork Tenderloin Recipe

This Thanksgiving I am thankful for SO many things.  One of which is having Julie an email away to frantically ask for a crock pot suggestion for a White Plume Thanksgiving lunch I helped organize.  I, too, recommend this recipe from Allrecipes.com.  It passed with flying colors.  There were no leftovers.


Crock Pot Pork Tenderloin using Onion Soup Mix


Ingredients:

1 pork tenderloin 
1 (1 ounce) envelope dry onion soup mix
1 cup water
3/4 cup red wine
3 tablespoons minced garlic
3 tablespoons soy sauce
*I added a shallot because I had one this past time.  Loved the flavor*
freshly ground black pepper to taste

Directions:

1. Place pork tenderloin in a slow cooker.
2.  Top with the contents of the soup packet.  I have used Lipton and for reference the package looks like this below.  Use only one packet.  Save the other for next time!


2. Pour water, wine, and soy sauce over the top, turning the pork to coat.  

3. Carefully spread garlic over the pork, leaving as much on top of the roast during cooking as possible. 

4. Sprinkle with pepper,  and cover.

5.  For a 1 lb tenderloin cook on low for an hour and high for the final 3.  Add an hour for every additional lb.  I have used a 2.5 lb tenderloin and cooked on low for 2 hours and high for 3.  It fell apart with tenderness.

* As long as there is liquid in the crockpot, you can continue cooking or leave it on "keep warm."

The pork tenderloin in this one is a massive 2.5 pounder.  
Your house will smell amazing.  I have always loved the pre-made tenderloins but nothing compares to this!


Note:

I now make a gravy for the tenderloin and potatoes.  Add some butter to a pan and slowly whisk in some flour to thicken.  Scoup a some of the gravy and whisk until you achieve your desired thickness.


I leave you with a picture of my 'art project' for the office luncheon centerpiece.  It is a Thanksgiving tree.  Each employee wrote what they were thankful for. It came together quite easily/nicely.


HAPPY THANKSGIVING TO ALL!

*Updated pictures and details 11/4/2014*

Thursday, August 4, 2011

Lemon Ice Box Pie/Sweet Home Viewing Party


Burlap tablecloths, mason jar glasses, candleholders, daisies, paper plates, sweet tea, lemon ice box, and cobbler!
I have been a busy bee fitting in summer events while the summer disappears before my eyes.  School finished last week.  My friend and coworker's brother (Tribble) is on the CMT "bachelorette-style TV" show Sweet Home Alabama.  Seems like an excuse for a party to me!  What better for a summertime party than a summertime theme....and summertime desserts?

I wanted to try lemon ice box pie.  I know, it goes against my "dessert should have chocolate in it" belief.  I ended up making two pies and a classic peach cobbler (leftovers are certainly headed to work). 

I tried my grandmother's (Maw's) recipe and Emeril's recipe.  They are two very different pies.  I thought I would like Emeril's but I liked Maw's recipe better.  It is a little more work but light and fluffy...how I think a lemon ice box should be.  My meringue on top didn't do as I hoped.  Water got in the egg whites.  I know, big mistake.  But I went with it.  Here are the recipes if you are interested!

Maw's Lemon Ice Box Pie:
I don't have a pie plate...so a quiche dish had to do!

Emeril's Recipe:

Ingredients:

  • 1 (8-ounce) package cream cheese, at room temperature
  • 1 (14-ounce) can condensed milk
  • 1/2 cup fresh lemon juice
  • 1 tablespoons lemon zest
  • 1 teaspoon vanilla extract
  • 1 prepared graham cracker crust (I used Maw's recipe above)

Directions

Combine the cream cheese, milk, lemon juice, lemon zest, and vanilla in a large bowl. Mix on medium speed until smooth. Pour into the pie crust. Refrigerate overnight.


I will leave you with a few fun party pictures.  United Way campaign starts in the morning and I have guests and a company meeting to prepare for!

Lanterns out front - Sarah enjoys. :)
Special guest...the Kirbster!
Yes, those are Ball jars.  Just like the show. :)
Amusement.
The crew...we don't get together enough!

Sunday, July 17, 2011

Meatballs and Mixers

I finally used my mixer today.  I didn't really take many good pictures so I apologize.  I just wanted to document this occasion.  I realize you can do meatballs by hand but why when I have an excuse to use my mixer!?

I already had taken off the attachment. Oops

Yummy recipe from Julie.  Made them and froze them for dinners.

Again, slacking on photography!

In case you need a good meatball recipe:


In stead of frying Julie (and I) bake them in the oven 350 for 20 minutes.  It is perfect!

Saturday, July 16, 2011

Hot and Hot - Molten Chocolate Lava Cakes


Hot and Hot Fish Club's Molten Chocolate Laval Cake


Alright folks, I was lazy again.  There is no way to copy and paste the recipe from what I found online, so I took another picture.  This whole cookbook looks fabulous and highly recommended by Lance and Julie.  I want it myself.  I've STILL never been to Hot and Hot.  That is ridiculous.  After this recipe, I want to go.

Best part about these ingredients, they are likely in your panty.  And also great, the batter can be kept chilled and covered in the frig up to a week ahead of time!
Melt the chocolate and the butter in a double boiler.
You will need at least a half dozen.  3 eggs and 3 yolks.

This is when a mixer comes in handy (STILL HAVENT USED MINE).  You want to beat the sugar and eggs until they have doubled in size and are light yellow.

While that was happening we buttered and sugared the ramekins.    You will want to be sure not to skip this step.  You will invert the cakes and want them to fall out effortlessly.

I had to take this picture.  72 ox bag.  The Smiths don't play around.

Stir the two batters together.  By now you have taken the chocolate mixer off the stove and let cool a bit.

We tried all size ramekins.  I suggest these are too small.  We found it was a science to figure out the right size and the right temperature/length of time to cook the cakes.  These were too small.

We certainly didn't mind sampling in the meantime.

These were the larger ramekins and our favorite!
I tried Lance's magic trick to keep the Henry happy. :)

The final result.  Before Sugar.  We filled the ramekins half full and baked at 400 degrees and suggest 13.5 minutes in a convection oven.  I tell you, it is an exact science.  Practice ahead of time.

How beautiful!?
These would be wonderful to make ahead of time for a party because they can be prepared ahead of time and, if the timing is perfected, are simple.  I think this is a recipe we will certainly try again!

The magic trick worked.  This guy was out like a light and took a second to wake!  He is certainly used to the noise of us screaming and the mixer.  :)

Thursday, July 7, 2011

Homemade Chocolate Ice Cream - Wendy's Frosty Style!

Homemade Chocolate Ice Cream - Wendy's Frosty

Do you like Wendy's frosties? If you do, you will want this recipe. This is a proven recipe Mom has made for MANY Scarbrough family reunions (including this weekend). It is extra enjoyable when it is hot outside (so make it this weekend).

I've been meaning to post this recipe for some time now. I took these pictures over Memorial Day and ended up making ice cream again the Friday before the 4th weekend for work.  It was "jeans day" so I suggested ice cream.  It was a good excuse for a work party...

The recipe:

-2 cans sweetened condensed milk (I use one regular and one fat free.)
-1 qt chocolate milk (I normally use Publix 1% because it comes in pint size...but not shown in pic)
-12 oz coolwhip (I use light.)
-1/4 c. chocolate syrup
-Rock salt
-ICE (you will need all the ice in your frig and possibly more...i always buy a bag)

Simply mix all ingredients in the container...

Rock salt is important.  The more you use, the quicker it will freeze.

The after product...
White Plume break room mini celebration...

P.S.  This shows you don't need a fancy ice cream maker.  I love mine (thanks Mom...or Easter Bunny...or Santa).  You can get one similar here.

Monday, July 4, 2011

Julia Child's Spinach Souffle

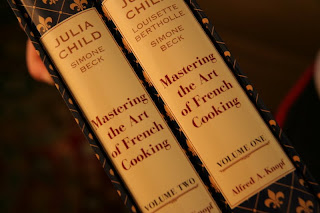
Julia - I do not think your books are suited for me.  This is why I waited until I was with Catherine to attempt a recipe. 

I think we succeeded!  Evidence...

I think I will stick to the basics for now, though.  Below are our steps along the way:

Spinach and scallions...

Making the sauce...


Separating the eggs...


Swiss cheese...the more the merrier...

Adding yolks to the sauce...

Egg whites...the main ingredient....

Mixing it all before we...

Slowly folded in egg whites...

More egg whites...

Lining the pan with cheese and butter...Catherine noted to butter in the upwards direction to encourage it to rise...

Catherine also showed me another trick.  By scraping the edge of the pan with your finger, it will rise upward more than outward.

Impatiently waiting...30 minutes FINALLY.  Yes, we got to eat at 10.  It was a long day and a late start!
Example of patiently waiting...

And the result!


Catherine just came back from France a couple weeks ago so this was perfect.  We thought about macaroons but for some reason they scare me.  I think I will eventually get over it...